 Save
Save My brother texted me at noon asking what to bring to his coworkers potluck, and I typed back without thinking: Buffalo chicken sliders. He called ten minutes later from the grocery store, panicking because he'd never made them. I walked him through it while folding laundry, and by evening he sent a photo of an empty pan and five requests for the recipe. That's when I knew these sliders weren't just good, they were dangerously shareable.
I made these for a birthday cookout last summer and watched a quiet cousin go back for thirds. She never goes back for anything. Later she admitted she'd been trying to figure out if it was acceptable to wrap one in a napkin and take it home. I handed her two.
Ingredients
- Cooked chicken breast, shredded: Rotisserie chicken works beautifully here and saves you 20 minutes, just pull it apart with your hands while it's still warm.
- Buffalo wing sauce: This is the tangy backbone of the dip, so choose a brand you'd actually dip wings into, not one that tastes like regret.
- Cream cheese, softened: Leave it on the counter for an hour or microwave it for 15 seconds, because cold cream cheese turns mixing into an arm workout.
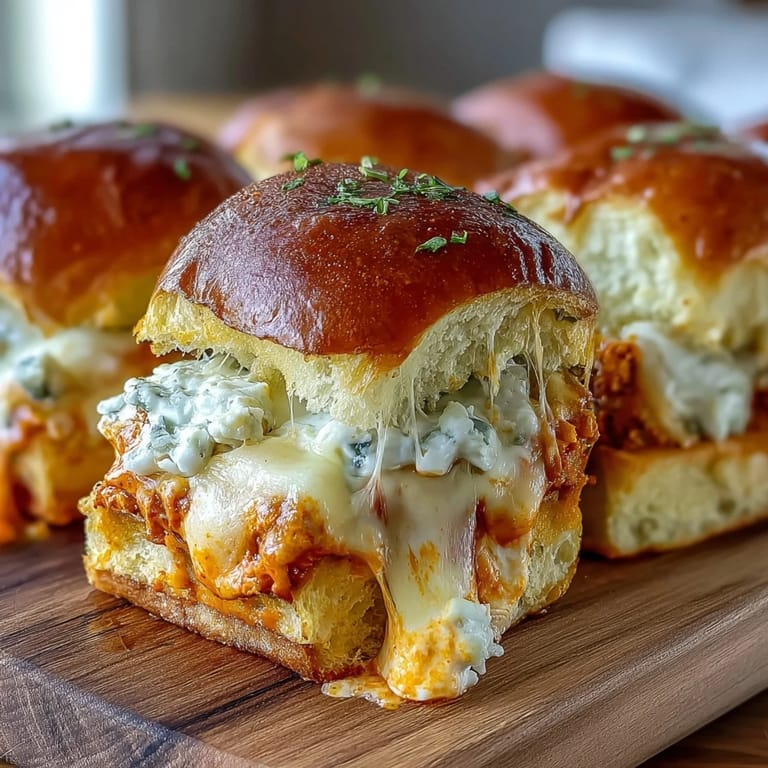
- Ranch dressing: The cool creamy contrast to the heat, and if you're a blue cheese person, swap it without guilt.
- Sour cream: Adds a slight tang that balances the richness and keeps the dip from feeling too heavy.
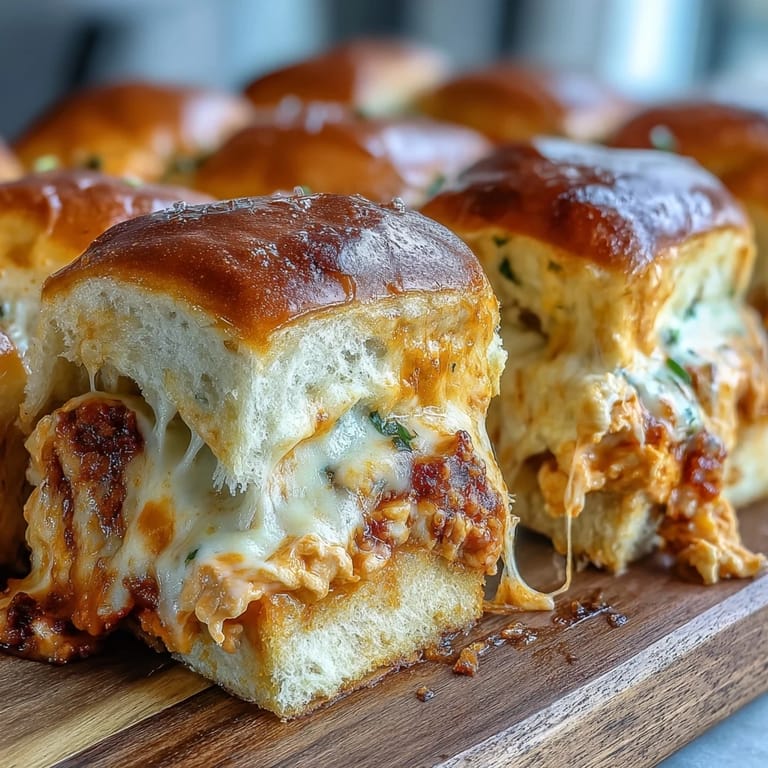
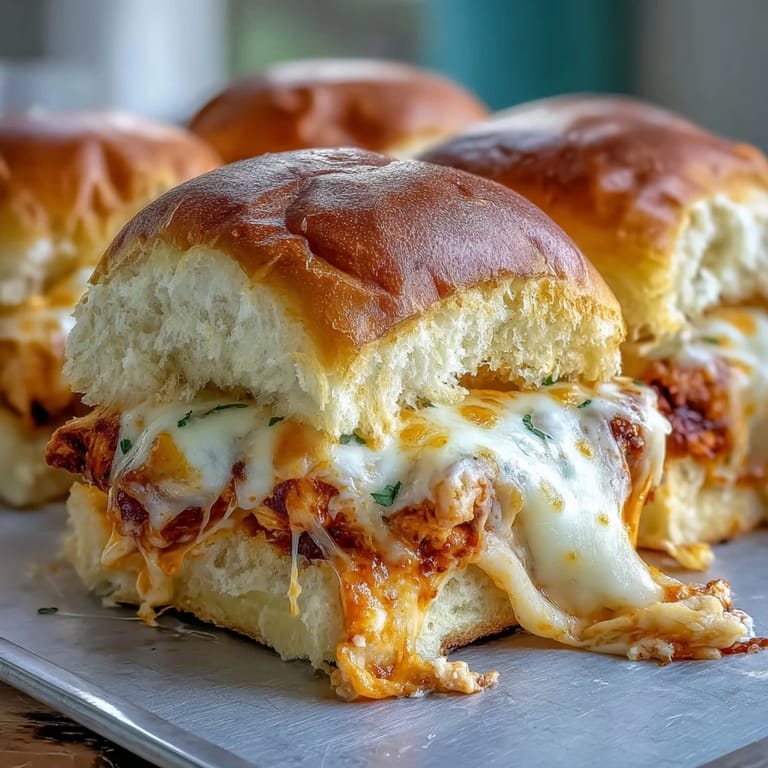
- Shredded mozzarella cheese: Melts into those beautiful cheese pulls everyone wants to photograph before eating.
- Shredded cheddar cheese: Brings a sharper flavor and that golden bubbling top that makes people lean in closer.
- Slider buns: Hawaiian rolls are ideal because their slight sweetness plays off the spice, but any soft dinner roll will cradle this dip like it was born to.
- Unsalted butter, melted: Brushed on top, it turns the buns into golden, crispy little hats that crunch when you bite down.
- Garlic powder: Just enough to make the tops taste intentional, like you planned every detail.
- Chopped fresh parsley: Optional, but it makes the pan look less like a cheese crime scene and more like something you meant to serve.
Tired of Takeout? 🥡
Get 10 meals you can make faster than delivery arrives. Seriously.
One email. No spam. Unsubscribe anytime.
Instructions
- Preheat and Prep:
- Set your oven to 350°F and grease a 9x13 inch baking dish lightly with butter or nonstick spray. This keeps the bottoms from sticking when you try to lift out the first slider.
- Mix the Buffalo Chicken Dip:
- In a large bowl, combine the shredded chicken, Buffalo sauce, cream cheese, ranch dressing, and sour cream, stirring until everything is evenly coated and creamy. It should look like the filling of the best chicken dip you've ever snuck a spoon into.
- Fold in Half the Cheese:
- Stir in half of the mozzarella and half of the cheddar, saving the rest for later. This adds creaminess inside while leaving enough cheese to create that bubbly golden top.
- Slice and Layer the Buns:
- Slice the slider buns in half horizontally, keeping the top and bottom layers intact if you can, then place the bottom halves in the prepared dish. This makes assembly faster and keeps everything from sliding apart.
- Spread the Dip:
- Spoon the Buffalo chicken mixture evenly over the bottom buns, spreading it all the way to the edges. Every slider should get its fair share of creamy, spicy filling.
- Top with More Cheese:
- Sprinkle the remaining mozzarella and cheddar over the chicken layer, covering it completely. This is where the magic happens, the cheese melts down into the dip and up onto the bun tops.
- Add the Bun Tops:
- Place the top halves of the buns over the cheese, pressing down gently so everything nestles together. It should look like a puffy, connected sheet of slider potential.
- Brush with Garlic Butter:
- Mix the melted butter with garlic powder and brush it generously over the tops of the buns. This step turns them golden and crispy and makes your kitchen smell like a pizzeria.
- Bake Covered, Then Uncovered:
- Cover the dish with foil and bake for 15 minutes, then remove the foil and bake another 8 to 10 minutes until the cheese is bubbly and the tops are golden brown. The foil traps steam to melt the cheese, and removing it crisps the tops.
- Garnish and Slice:
- Sprinkle with chopped parsley if you want a pop of color, then slice between the buns and serve warm. They're best when the cheese is still stretchy and the buns are soft inside, crispy outside.
 Save
Save The first time I served these, someone asked if I'd catered. I laughed and said no, but later I realized that's the best compliment a simple recipe can get. It tastes like effort, but it's really just layering things you already love and letting heat do the work.
Making Them Ahead
You can assemble the whole pan up to the point of baking, cover it tightly with plastic wrap, and refrigerate for up to six hours. When you're ready, let it sit at room temperature for 15 minutes, then bake as directed. I've done this for tailgates and it's a lifesaver when you need to arrive with something hot and impressive but don't want to cook in a parking lot.
Scaling for a Crowd
Double the recipe and use two pans, or triple it for a block party where you know people will go back for seconds. I once made 36 sliders for a neighborhood potluck and they were gone in under 20 minutes. If you're feeding that many, keep one pan warming in the oven while the other gets devoured.
Serving Suggestions
These sliders are rich enough to be the main event at a casual gathering, but they also pair well with celery sticks, carrot sticks, and extra Buffalo sauce for dipping. I like setting out a bowl of ranch and a bowl of blue cheese dressing so people can choose their own cooling agent. A simple green salad or coleslaw on the side balances the richness without stealing the spotlight.
- Serve with pickle spears for a tangy crunch that cuts through the cheese.
- Set out napkins, lots of them, because these sliders are gloriously messy.
- If there are any leftovers, wrap them individually and reheat in a 300°F oven for 10 minutes, they taste just as good the next day.
 Save
Save These sliders have become my go to whenever I need to feed people quickly and make them happy at the same time. They're proof that comfort food doesn't have to be complicated, just honest and generous and warm.
Recipe Questions & Answers
- → Can I prepare these sliders ahead of time?
Yes, assemble the sliders completely, cover tightly with foil, and refrigerate for up to 24 hours. When ready to serve, bake as directed, adding 5-10 extra minutes to the covered baking time since they'll be cold.
- → What type of chicken works best?
Rotisserie chicken is ideal for convenience and flavor. You can also use leftover cooked chicken breast, poached chicken, or even canned chicken in a pinch. Just ensure it's well-shredded for even distribution.
- → How can I adjust the spice level?
For milder sliders, use less Buffalo sauce or mix in extra ranch dressing. For more heat, add cayenne pepper, jalapeños, or use a spicier hot sauce. You can also serve extra sauce on the side for guests to customize.
- → Can I use different types of buns?
Absolutely! While Hawaiian rolls add a touch of sweetness, regular dinner rolls, potato rolls, or brioche buns work wonderfully. Just ensure they're soft and can hold the filling without falling apart.
- → How do I store and reheat leftovers?
Store leftover sliders in an airtight container in the refrigerator for up to 3 days. Reheat in a 300°F oven for 10-15 minutes until warmed through, or microwave individual sliders for 30-45 seconds.
- → What can I serve alongside these sliders?
These pair perfectly with celery and carrot sticks, tortilla chips, pickles, or coleslaw. Add extra ranch or blue cheese dressing for dipping, and consider serving with potato salad or a fresh green salad for a complete spread.