Save
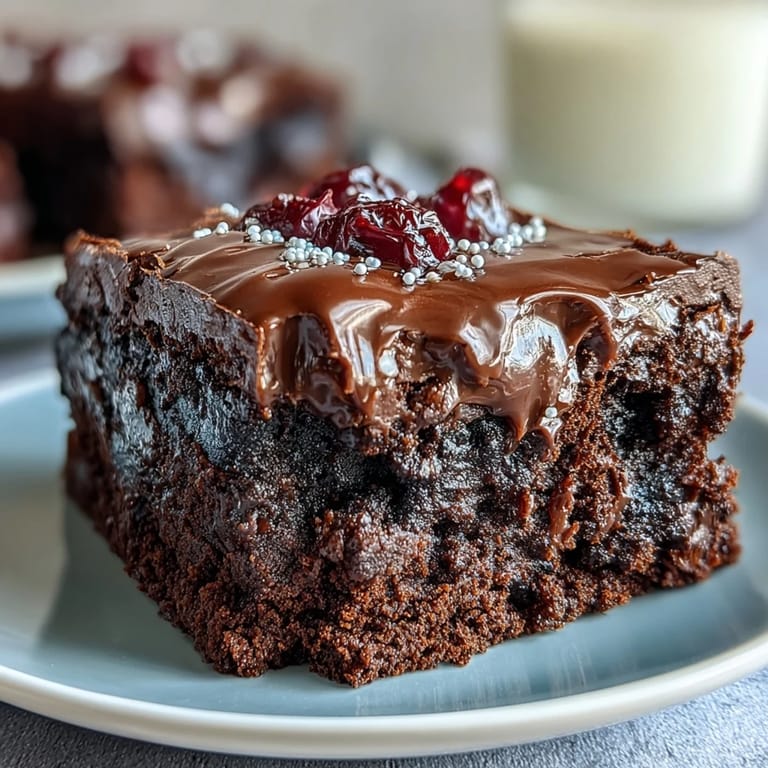
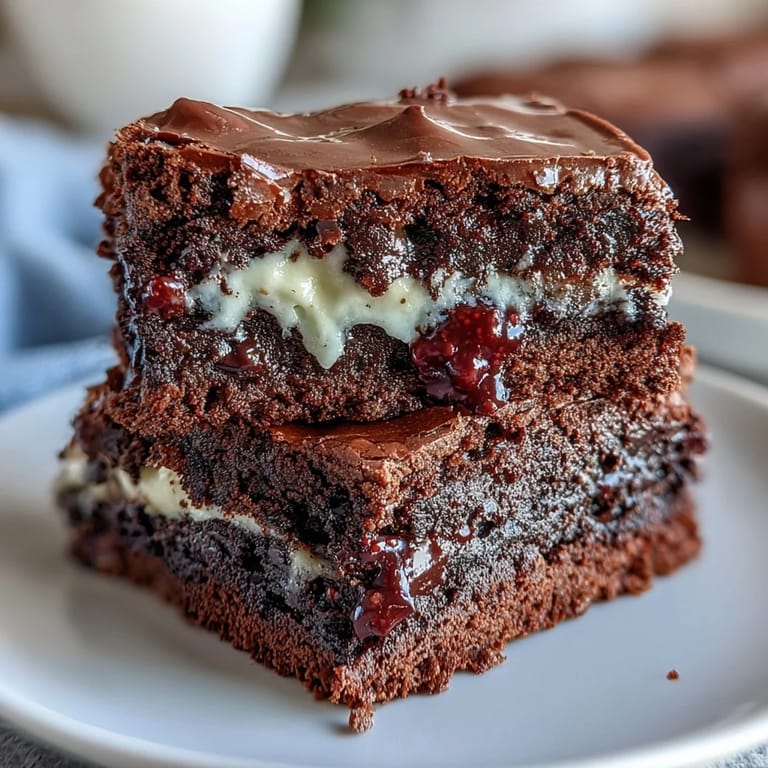
Save My neighbor showed up at my door two summers ago with a tin of these tiny fudgy bites, and I was immediately hooked. She'd made them for the Fourth of July block party, and I watched people gravitate toward her dessert table like moths to a flame. What struck me most wasn't just how rich and chocolatey they were, but how the creamy frosting and those patriotic sprinkles made something so simple feel genuinely celebratory. I pestered her for the recipe that same evening, and now they're the one thing I always make when we fire up the grill.
Last year I made a double batch thinking I'd have extras for the next day, but they disappeared before the fireworks even started. A friend's kid asked for one more just as we were heading outside, and I ended up handing over the last four because the look on her face was worth it. That's when I realized these aren't just desserts, they're the kind of thing that makes a holiday feel a little more special.
Ingredients
- Unsalted butter: Use room temperature or slightly warm so it incorporates smoothly with the sugar and eggs without clumping.
- Granulated sugar: This sweetens the batter and helps create that signature fudgy texture when baked.
- Large eggs: They bind everything together and give the brownies their tender crumb, so don't skip them or substitute.
- Vanilla extract: Just a teaspoon rounds out the chocolate flavor without overwhelming it.
- Unsweetened cocoa powder: The star of the show, so use good quality if you have it, and sift it if it's lumpy.
- All-purpose flour: Keeps the bites from being too dense, but don't overmix once you add it or they'll get tough.
- Salt and baking powder: A pinch of each balances the sweetness and helps them rise just enough to stay tender.
- Cream cheese and butter for frosting: Both need to be softened so they whip up light and fluffy together.
- Powdered sugar: Creates that silky frosting texture, and sifting it prevents lumps.
- Red, white, and blue sprinkles: The fun part, so don't hold back or skip this entirely.
Tired of Takeout? 🥡
Get 10 meals you can make faster than delivery arrives. Seriously.
One email. No spam. Unsubscribe anytime.
Instructions
- Get your oven ready and pan prepared:
- Preheat to 350°F and grease a 24-cup mini muffin pan or line each cup with a tiny paper liner. This prevents sticking and makes serving easier.
- Melt and mix the wet ingredients:
- Microwave the butter until just melted, then stir in the sugar, eggs, and vanilla until everything looks smooth and combined. The mixture should be homogeneous, not grainy.
- Fold in the dry ingredients:
- Sprinkle the cocoa powder, flour, salt, and baking powder over the wet mixture and stir just until you don't see any white streaks. Overmixing at this stage leads to dense brownies, so stop as soon as everything is barely combined.
- Fill the muffin cups:
- Spoon the batter evenly into each cup, filling to about three-quarters full so they don't overflow. A small ice cream scoop makes this quick and tidy.
- Bake until fudgy:
- Bake for 12 to 15 minutes, checking around 12 with a toothpick. You want it to come out with just a few moist crumbs still clinging to it, not completely clean.
- Cool gently:
- Let them sit in the pan for 5 minutes so they firm up slightly, then transfer to a wire rack to cool completely. Rushing this step risks them crumbling when you frost them.
- Make the frosting:
- Beat the softened cream cheese and butter together until creamy, then gradually add the powdered sugar and vanilla while beating on medium speed. Add milk a tablespoon at a time until you reach a spreadable consistency.
- Frost and decorate:
- Once the brownies are completely cool, pipe or spread a generous dollop of frosting on top of each one. Immediately sprinkle with red, white, and blue sprinkles so they stick to the frosting.
- Add the finishing touch:
- If you're using mini sparkler toppers or festive toothpicks, press them gently into the frosting right before serving. This makes them look truly celebratory.
 Save
Save There's something genuinely magical about watching people's faces light up when they bite into one of these. A few years back, a friend who claims she never eats sweets ate four in a row without even realizing it, then laughed at herself in that embarrassed way that made the whole party feel warmer.
Why These Work for Any Summer Gathering
These brownie bites hit a sweet spot between being special enough for a holiday celebration and simple enough that you can make them without stress. They travel well in a container, they don't require any fancy equipment beyond what most home cooks already have, and they're forgiving enough that even if you slightly overbake a batch, they're still delicious. Plus, they make your kitchen smell incredible for hours afterward.
Storage and Make-Ahead Tips
You can bake the brownie bites up to two days ahead and store them unfrosted in an airtight container at room temperature, then frost them a few hours before serving. The frosting stays fresh-tasting for about three days in the fridge, and the whole assembled bites keep well in an airtight container for up to three days, though they're best eaten within the first day or two. If you're making these for a party, do yourself a favor and frost them right before guests arrive so the frosting looks fresh and the sprinkles don't slide around.
Mix-Ins and Variations You Can Try
These brownies are delicious as written, but they're also a blank canvas for your own creative touches. Swirl a tiny bit of peanut butter or cream cheese into the batter before baking, or add mini chocolate chips right into the batter for extra decadence. You can use different sprinkle colors for other holidays, swap the cream cheese frosting for chocolate ganache or salted caramel, or even top them with crushed candy or edible glitter for extra shimmer. The beauty is that the base recipe is so solid that you can play around and it still works.
- Keep a backup tin in your freezer unfrosted, and you can frost them last-minute for unexpected guests.
- If your frosting looks too thick, add milk one teaspoon at a time rather than dumping it all in at once.
- Let the batter rest in the bowl for a minute or two before spooning it into the pan so any air bubbles rise to the top and escape.
 Save
Save There's nothing quite like a homemade treat that brings people together on a warm summer day. Make these, watch them disappear, and enjoy the small joy of knowing you created something delicious with your own hands.
Recipe Questions & Answers
- → What type of cocoa powder works best for these brownies?
Unsweetened cocoa powder is preferred to achieve a deep chocolate flavor and balanced sweetness.
- → Can I make these brownies gluten-free?
Yes, substituting all-purpose flour with a gluten-free blend works well without compromising texture.
- → How do I achieve a creamy frosting consistency?
Beat together softened cream cheese and butter until smooth, then gradually add powdered sugar and a splash of milk to reach desired spreadability.
- → What is the best way to prevent the brownie bites from sticking to the pan?
Greasing the mini muffin pan thoroughly or lining with mini paper liners ensures easy removal after baking.
- → How should I store the brownie bites to keep them fresh?
Store in an airtight container in the refrigerator for up to three days to maintain moisture and flavor.