 Save
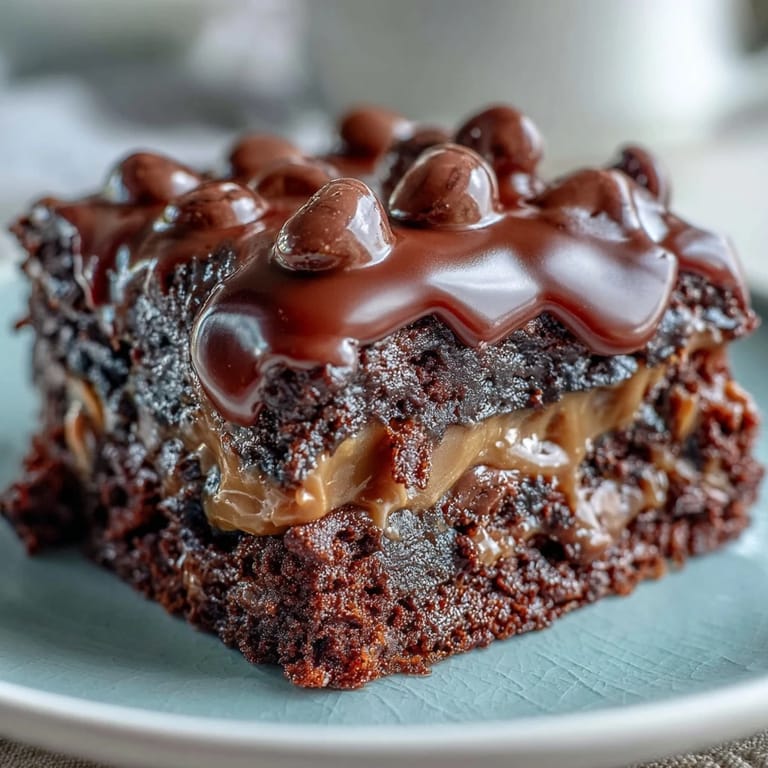
Save The first time I made this dump cake, I actually forgot to add the peanut butter cups until the very last minute and had to scatter them over partially baked batter. That happy accident turned into the most incredible gooey, chocolatey mess my friends had ever tasted. Now it is the only dessert requested at every gathering, and I have learned that sometimes the best recipes come from moments of panic in the kitchen.
Last summer, my neighbor stopped by while this was baking and actually knocked on the door to ask what smelled so heavenly. We ended up eating warm squares straight from the pan on her back porch while her kids played in the yard. That afternoon turned into a monthly dessert swap tradition, and this peanut butter cup cake remains the undefeated champion.
Ingredients
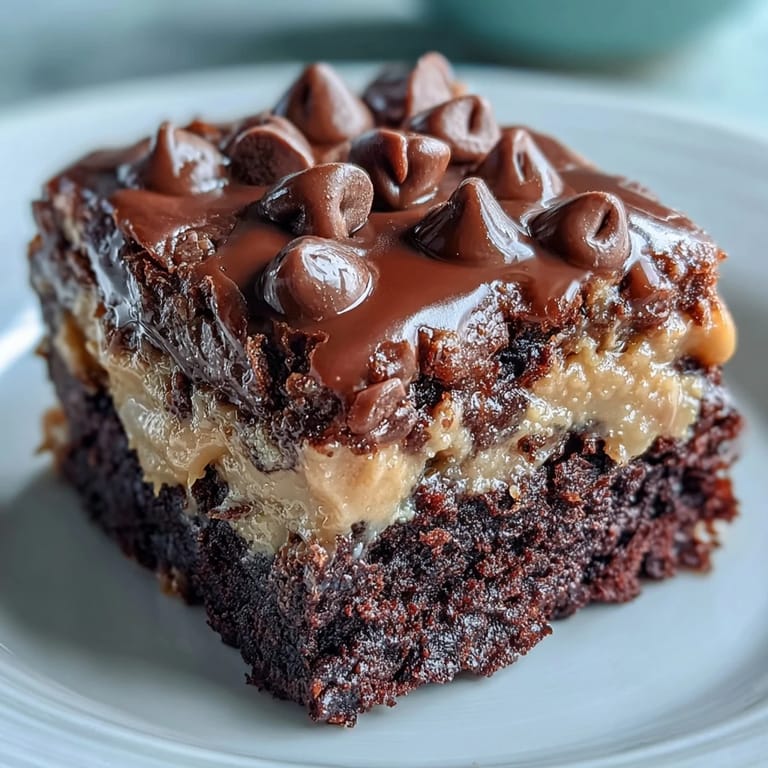
- Devils food chocolate cake mix: This creates the perfect rich, dark chocolate base that balances the sweet peanut butter beautifully
- Creamy peanut butter: Room temperature peanut butter spreads evenly and creates that irresistible gooey layer at the bottom
- Unsalted butter, melted: Melted butter mixes into the cake mix better than softened and helps create a moist, tender crumb
- Whole milk: The richness of whole milk makes the cake extra moist and helps balance the dense peanut butter layer
- Mini peanut butter cups: Mini cups distribute more evenly throughout the cake than full sized ones
- Semi sweet chocolate chips: These add pockets of intense chocolate flavor and extra texture throughout the cake
Tired of Takeout? 🥡
Get 10 meals you can make faster than delivery arrives. Seriously.
One email. No spam. Unsubscribe anytime.
Instructions
- Get your oven ready:
- Preheat to 350°F and generously grease a 9x13 baking dish
- Start with the peanut butter layer:
- Spread the room temperature peanut butter in an even layer across the bottom of your prepared dish
- Mix the cake batter:
- Whisk together the cake mix, melted butter, and milk until just combined, remembering that small lumps are perfectly fine
- Layer it up:
- Pour the chocolate batter carefully over the peanut butter layer, trying not to disturb the bottom too much
- Add the goodies:
- Scatter those mini peanut butter cups and chocolate chips evenly across the top of the batter
- Bake until golden:
- Bake for 35 to 40 minutes until the cake is set and a toothpick comes out with just a few moist crumbs
- Patience pays off:
- Let it cool for at least 15 minutes before serving warm, or completely if you want cleaner slices
 Save
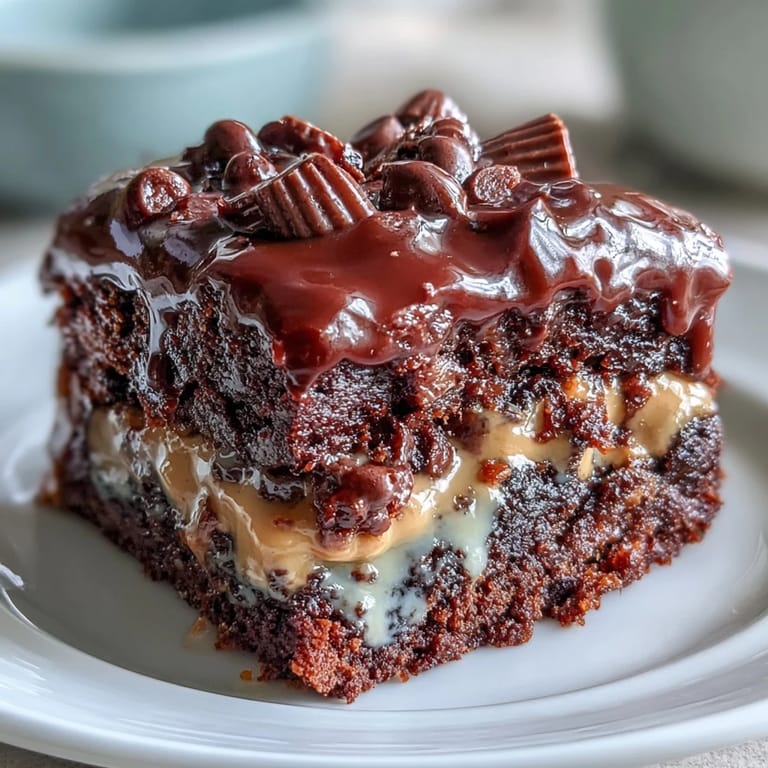
Save My sister in law requested this for her birthday instead of a fancy bakery cake, and watching her face light up when she took the first bite made me realize that simple comfort foods often mean more than elaborate desserts. Sometimes the most unpretentious recipes become the ones people remember most.
Making It Your Own
After making this dozens of times, I have found that adding a handful of chopped roasted peanuts on top takes the texture to another level. The salty crunch against the sweet, soft cake is something I discovered by accident when I was trying to use up leftover nuts from a previous recipe.
Serving Suggestions
While this cake is incredible on its own, a scoop of vanilla ice cream melting over a warm piece creates the most perfect dessert experience. The cold creaminess balances the rich, dense cake and somehow makes each bite feel even more indulgent.
Storage and Make Ahead Tips
This cake actually tastes even better the next day as the flavors meld together and the peanut butter layer becomes even more gooey. I often bake it the night before serving and store it covered at room temperature, though the refrigerator works too if your kitchen runs warm.
- For the best texture, warm individual slices in the microwave for about 15 seconds before serving leftovers
- The cake can be frozen for up to three months, wrapped tightly in plastic and foil
- Always bring refrigerated cake to room temperature before serving for the best texture
 Save
Save Every time I serve this, someone asks for the recipe, and I love watching their reaction when I explain how simple it is to make. Good food does not have to be complicated to bring people together.
Recipe Questions & Answers
- → Can I make this with natural peanut butter?
Natural peanut butter can work, but creamy commercial peanut butter with added oils creates a better texture. Natural varieties may be too thick to spread evenly and could affect the final consistency.
- → Should I serve this warm or at room temperature?
This dessert tastes best served warm, when the peanut butter cups are still slightly melted and gooey. However, for cleaner slices, let it cool completely before cutting, then reheat individual portions if desired.
- → Can I prepare this ahead of time?
You can assemble everything up to 24 hours in advance and store it covered in the refrigerator. Bring to room temperature for 30 minutes before baking, or add 5-10 minutes to the baking time.
- → What's the best way to store leftovers?
Keep covered at room temperature for up to 2 days, or refrigerate for up to 5 days. The texture will become denser when chilled, but it reheats beautifully in the microwave for 20-30 seconds.
- → Can I use a different type of cake mix?
Chocolate fudge or German chocolate cake mix work well too. Avoid yellow or white cake mixes as they won't provide the intense chocolate flavor needed to balance the peanut butter.