 Save
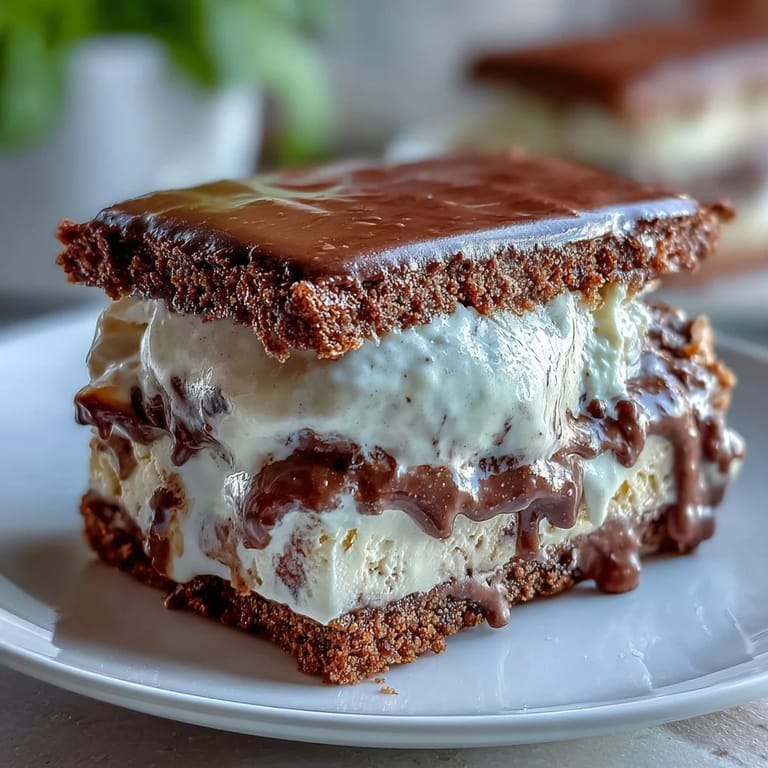
Save My friend texted me a photo of her iced vanilla frappuccino on a sweltering afternoon, and I found myself staring at it for way too long thinking: what if I could eat that? That's when these ice cream sandwiches were born—a moment of pure desperation disguised as inspiration. The combination of rich espresso cookies and creamy vanilla bean ice cream captures that exact coffee shop magic, except now it melts on your tongue instead of in a cup. Every bite tastes like summer decided to get fancy.
I made these for my book club last summer, and someone literally closed their eyes mid-bite and said nothing for a full ten seconds. That silence felt like a standing ovation. Since then, they've become my go-to when I need to impress people without looking like I'm trying too hard—which, let's be honest, is half the battle of entertaining.
Ingredients
- Unsalted butter, softened (1 cup): Room temperature butter is your friend here—it creams up beautifully and gives the cookies that tender crumb that makes espresso flavors pop.
- Packed brown sugar (1 cup) and granulated sugar (1/2 cup): Brown sugar brings moisture and depth while granulated sugar helps with spread and crispness around the edges.
- Large eggs (2): These bind everything and add richness to the dough without making it too cakey.
- Vanilla extract (2 tsp): Use real vanilla here—it won't compete with the espresso but instead softens its intensity in the nicest way.
- All-purpose flour (2 1/2 cups): This is your structure, and measuring it correctly (by weight if possible) makes all the difference between cookies that hold their shape and ones that spread everywhere.
- Unsweetened cocoa powder (1/2 cup): Adds a subtle chocolate note that makes the espresso sing without overwhelming it.
- Instant espresso powder (2 tbsp): This is the secret ingredient that transforms regular chocolate cookies into something café-worthy; don't skip it or substitute coffee.
- Baking soda (1 tsp) and salt (1/2 tsp): Baking soda helps the cookies spread just enough to be chewy in the middle, and salt amplifies every flavor.
- Heavy cream (2 cups) and whole milk (1 cup): The ratio matters—too much cream and your ice cream becomes grainy, too much milk and it won't have that luxurious texture.
- Granulated sugar (3/4 cup): Sweetens the ice cream base while keeping it scoopable when frozen.
- Vanilla bean, split with seeds scraped (or 2 tsp vanilla bean paste): This is worth the effort; those tiny black specks signal quality and taste like the real thing because they are.
Tired of Takeout? 🥡
Get 10 meals you can make faster than delivery arrives. Seriously.
One email. No spam. Unsubscribe anytime.
Instructions
- Make the vanilla bean custard:
- Combine milk, sugar, vanilla bean seeds and pod (or paste), and salt in a medium saucepan over medium heat, stirring occasionally until the sugar dissolves and you can see wisps of steam rising. Remove from heat, discard the pod if using a whole bean, then stir in the heavy cream and let the whole thing cool on the counter for a few minutes before moving it to the fridge.
- Chill the ice cream base thoroughly:
- This step feels like waiting for something wonderful, and it's essential—at least two hours gives the flavors time to get to know each other and the cold makes churning easier. You'll know it's ready when it's so cold it makes your fingers numb if you dip them in.
- Churn and freeze the ice cream:
- Follow your ice cream maker's instructions, but the magic moment is when it comes out looking like soft-serve and smells like pure vanilla. Spread it into a parchment-lined 9x13-inch pan to about an inch thick, then freeze for at least two hours until it's firm enough to cut with a cookie cutter.
- Cream the butter and sugars for the espresso cookies:
- In a large bowl with an electric mixer on medium speed, beat the softened butter with both sugars for about three minutes until it's pale, fluffy, and looks almost like frosting. This aeration is what gives your cookies their tender crumb, so don't rush it.
- Add eggs and vanilla:
- Beat in the eggs one at a time, letting each one fully incorporate before adding the next, then add vanilla extract and mix just until combined. The mixture might look slightly curdled—that's normal and fine.
- Combine dry ingredients in a separate bowl:
- Whisk together flour, cocoa powder, espresso powder, baking soda, and salt to distribute the espresso powder evenly so every cookie has the same café-quality flavor. This step prevents espresso powder clumps that would taste bitter.
- Mix wet and dry ingredients gently:
- Add the dry mixture to the butter mixture in a few additions, mixing on low speed until just combined—overworking develops gluten and makes cookies tough. Stop as soon as you don't see streaks of flour anymore.
- Roll and cut the cookie dough:
- Divide dough in half and roll each piece between two sheets of parchment paper to about 1/4 inch thickness, then use a 3-inch round cutter to cut out 16 cookies. The parchment prevents sticky dough disasters and makes cleanup effortless.
- Bake the cookies:
- Place cookies on parchment-lined baking sheets and bake at 350°F for 10–12 minutes until the edges look set but the center still has a tiny bit of give. They'll continue cooking slightly as they cool, so don't wait for them to look completely done in the oven or you'll end up with hard edges.
- Cool the cookies completely:
- Let them sit on the baking sheet for a few minutes, then transfer to a wire rack—this stops residual heat from cooking the bottoms. While they cool, you might notice they smell exactly like a coffee shop, which is exactly the point.
- Cut ice cream into rounds:
- Remove the frozen ice cream slab from the freezer and use the same 3-inch cutter to cut eight rounds, working quickly so the ice cream doesn't melt. If it gets too soft, pop it back in the freezer for 15 minutes and try again.
- Assemble the sandwiches:
- Place an ice cream round between two cookies and press gently until the ice cream kisses the cookies all the way around, creating a gentle seal. Work with one or two sandwiches at a time so they don't melt while you're assembling.
- Final freeze before serving:
- Wrap each sandwich in parchment paper and freeze for at least one hour to make sure everything is solid and they're easy to eat without melting all over your hands. This is also the perfect time to go do something else and come back to the best decision you made all week.
 Save
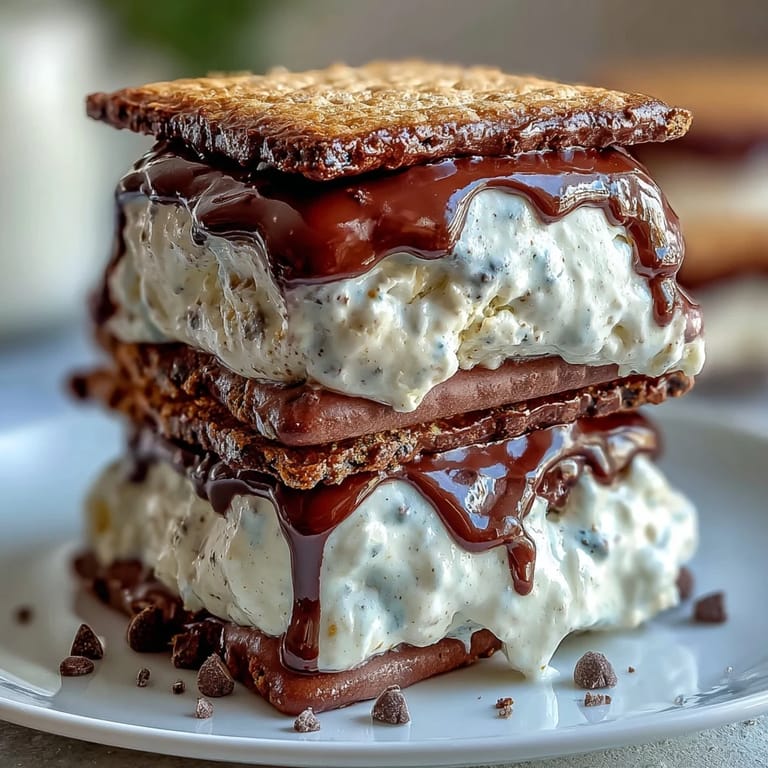
Save My nephew once told me these were better than the fancy ice cream sandwiches from the shop down the street, and his compliment meant more than any food reviewer could ever say. That's when I knew this recipe wasn't just about the flavors—it was about making something good enough to make people happy on the simplest level.
The Secret to Perfect Cookie Texture
The difference between mediocre espresso cookies and the ones people dream about is how you handle the dough. Once you mix wet and dry ingredients, stop immediately—seriously, the second you don't see flour streaks anymore, you're done. Over-mixing develops gluten and makes everything tough and crumbly instead of tender and worth eating. I learned this the hard way after making a batch that tasted like a hockey puck, and I've been a believer ever since.
Why Vanilla Bean Matters Here
Real vanilla bean with those tiny black specks isn't just prettier—it actually tastes different from extract, more floral and complex. When it sits in warm milk, those flavors open up in ways that make your ice cream taste handmade instead of like it came from a machine. If you can't find vanilla bean paste or fresh beans, vanilla extract works fine, but splurging on the real thing once will help you understand why some ice cream shops charge more.
Make These Your Own
These sandwiches are perfect as written, but they're also your blank canvas for experimentation. You could roll the edges in crushed espresso beans or mini chocolate chips before the final freeze, swap the vanilla bean for salted caramel ice cream, or even add a drizzle of chocolate between the cookie and ice cream if you're feeling ambitious. The beauty of homemade is that you get to decide what makes it perfect.
- For extra richness, brush the inside of each cookie with a tiny bit of melted chocolate before adding ice cream.
- If you don't have an ice cream maker, freeze the base in a shallow pan and stir it vigorously every 30 minutes until thick and creamy—it takes longer but absolutely works.
- Store these wrapped in parchment in an airtight container for up to two weeks, though they'll probably disappear much faster than that.
 Save
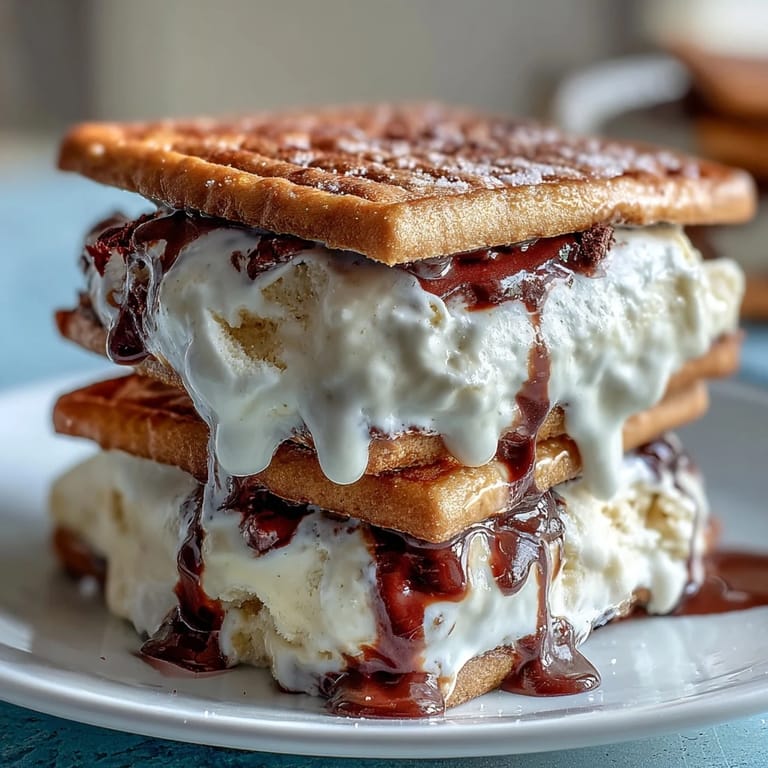
Save These ice cream sandwiches are proof that sometimes the best desserts are the ones you make yourself, with your own two hands and a little bit of patience. Serve them cold and watch people's faces light up.
Recipe Questions & Answers
- → What coffee flavor is used in the cookies?
The cookies are flavored with instant espresso powder, giving them a rich coffee taste that complements the creamy vanilla layers.
- → How is the vanilla flavor incorporated?
Vanilla bean seeds or paste are heated with milk and sugar to infuse the ice cream base with authentic vanilla aroma and flavor.
- → Can the ice cream be made without an ice cream maker?
Yes, you can freeze the ice cream base in a shallow dish, stirring every 30 minutes until thick and creamy for a no-machine option.
- → What is the texture of the espresso cookies?
The cookies are firm with a slight chew, baked to hold the creamy ice cream without becoming soggy.
- → Are there tips for extra crunch in the sandwiches?
Rolling the sandwich edges in mini chocolate chips or crushed espresso beans before freezing adds a satisfying crunch.