 Save
Save My grandmother never measured anything when making beans, but she taught me that the secret lives in the patience. She would start them in the morning while the coffee was still brewing, and by dinner the whole house would smell like comfort itself. I used to think it was just beans, but there something magical about watching them transform from hard stones to creamy perfection. Now I understand why she took such pride in something so simple.
Last winter I made a massive batch during a snowstorm when we had nothing else in the house. My roommate wandered into the kitchen around hour two of simmering, asking what smelled so incredible. We ended up eating them straight from the pot standing over the stove with tortilla chips, abandoning whatever dinner plans we had before.
Ingredients
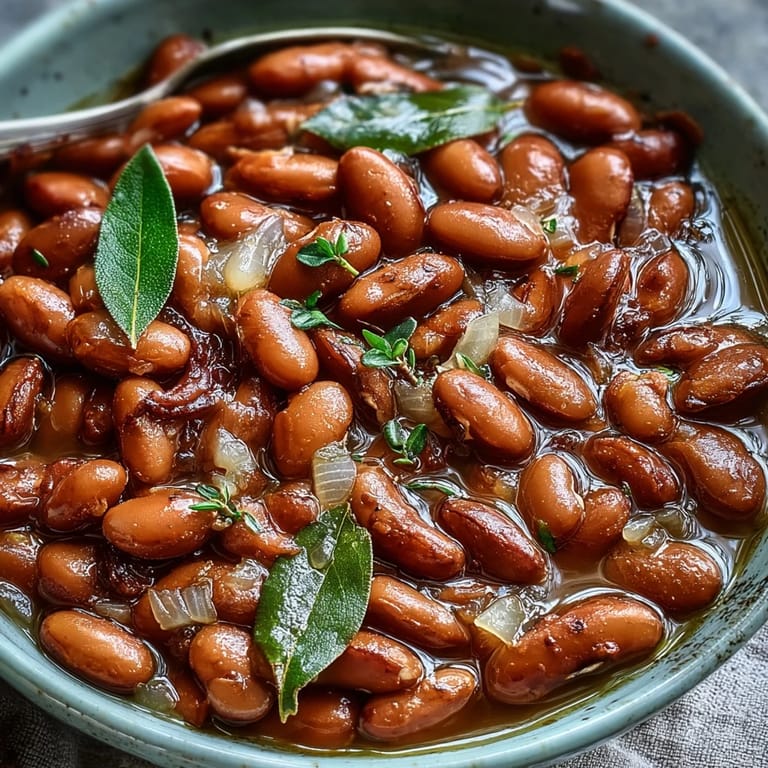
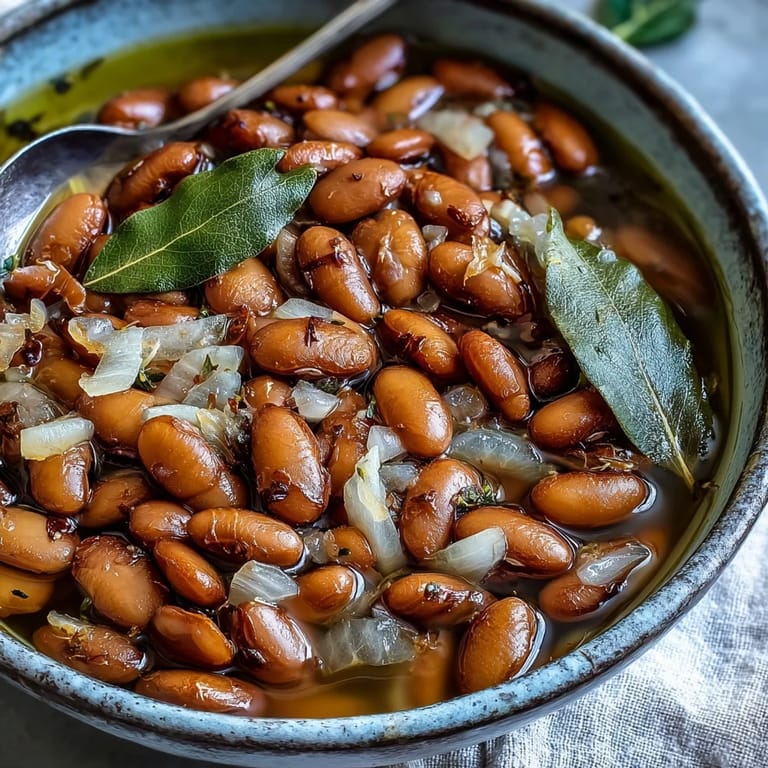
- 1 pound dried pinto beans: The foundation of everything, rinsed well to remove any dust or debris
- ½ medium yellow onion: Finely diced so it melts into the beans as they cook
- 2 teaspoons garlic: Minced fresh gives the best flavor, about two cloves worth
- 2 bay leaves: The quiet hero that adds depth without announcing itself
- ⅓ cup extra-virgin olive oil: This creates the creamy luxurious texture
- 4 cups cold water: The cooking liquid that becomes part of the finished dish
- 1 tablespoon kosher salt: Added at the end so the beans stay tender
Tired of Takeout? 🥡
Get 10 meals you can make faster than delivery arrives. Seriously.
One email. No spam. Unsubscribe anytime.
Instructions
- Soak the beans overnight:
- Place beans in a large bowl and cover with cold water by 2-3 inches. Let them soak at room temperature for 8-24 hours until they have plumped up nicely.
- Start the cooking:
- Drain and rinse the soaked beans, then transfer them to a Dutch oven or heavy pot. Add the 4 cups of cold water, diced onion, minced garlic, bay leaves, and olive oil.
- Bring to a gentle boil:
- Set the pot over medium-high heat and bring everything to a boil. Skim off any foam that rises to the surface with a spoon.
- Simmer slowly:
- Reduce the heat to medium-low and let the beans simmer gently, uncovered. Stir occasionally and add more water if needed to keep them submerged.
- Season and finish:
- During the last 10 minutes of cooking, stir in the salt and taste to adjust. When beans are tender but still holding their shape, remove from heat and discard the bay leaves.
 Save
Save These beans became my go-to contribution for potlucks after someone told me they were the best they had ever tasted. There is something so satisfying about serving something so humble and watching people light up.
Make Ahead Magic
I always cook a double batch because they freeze beautifully. Portion them into freezer bags with some of the cooking liquid, and you will have homemade beans ready for tacos or soup any night of the week.
Serving Ideas
Mash some of the cooked beans against the side of the pot to thicken the broth naturally. This creates the most incredible base for soups and chili, or just serve them over rice with a squeeze of lime.
Flavor Variations
While the classic version is perfect on its own, sometimes I like to add extra depth. A smoked ham hock or bacon transforms them into something entirely different but equally wonderful.
- Add a dried chili pepper during simmering for gentle heat
- Stir in fresh cilantro and lime juice right before serving
- Mash with extra oil and cooking liquid for instant refried beans
 Save
Save Good beans are worth every minute of the cooking time. There is nothing quite like a pot of beans simmering on the back burner to make a house feel like home.
Recipe Questions & Answers
- → Do I really need to soak pinto beans overnight?
Yes, soaking for 8-24 hours ensures even cooking and reduces cooking time significantly. It also helps break down compounds that can cause digestive discomfort, resulting in more tender, creamy beans.
- → Can I skip the olive oil?
You can use a neutral oil or reduce the amount, but the fat helps create a creamier texture and carries flavor. For oil-free version, expect slightly less rich results.
- → How do I know when the beans are done?
Taste test several beans—they should be tender throughout and creamy inside, not mealy or crunchy. They should hold their shape but easily yield to gentle pressure between your tongue and the roof of your mouth.
- → Why add salt at the end instead of the beginning?
Adding salt during the last 10 minutes prevents the beans from becoming tough and ensures even seasoning throughout. Early salting can make bean skins tough and prolong cooking time.
- → Can I make these in a slow cooker or pressure cooker?
Yes, adapt cooking times accordingly. For a pressure cooker, cook on high pressure for 25-30 minutes after soaking. For a slow cooker, cook on low for 6-8 hours or high for 3-4 hours.
- → What's the purpose of skimming the foam?
Skimming removes impurities and excess starch released during boiling, resulting in clearer cooking liquid and cleaner-tasting beans. It's especially important if you plan to use the cooking liquid.