 Save
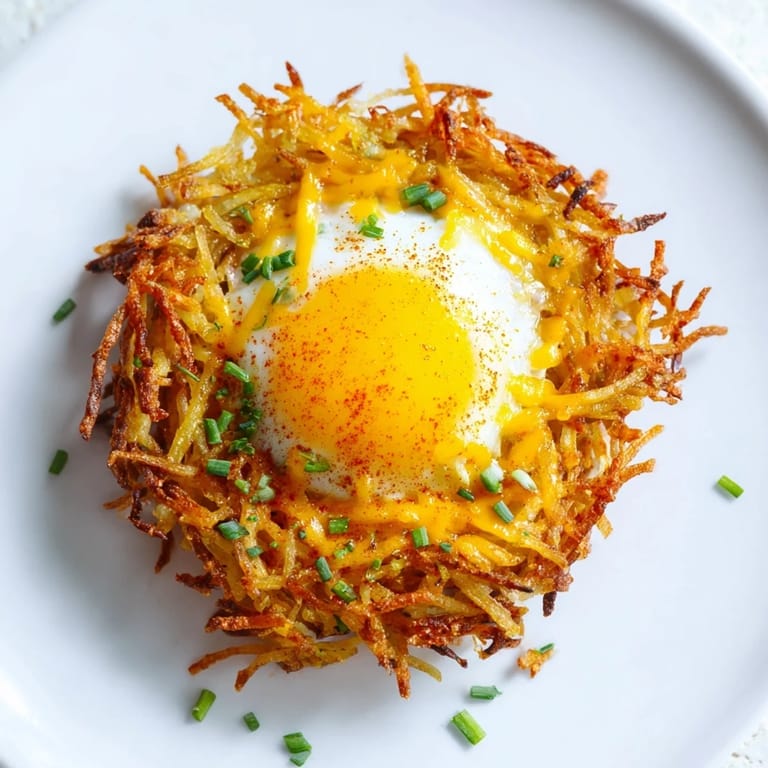
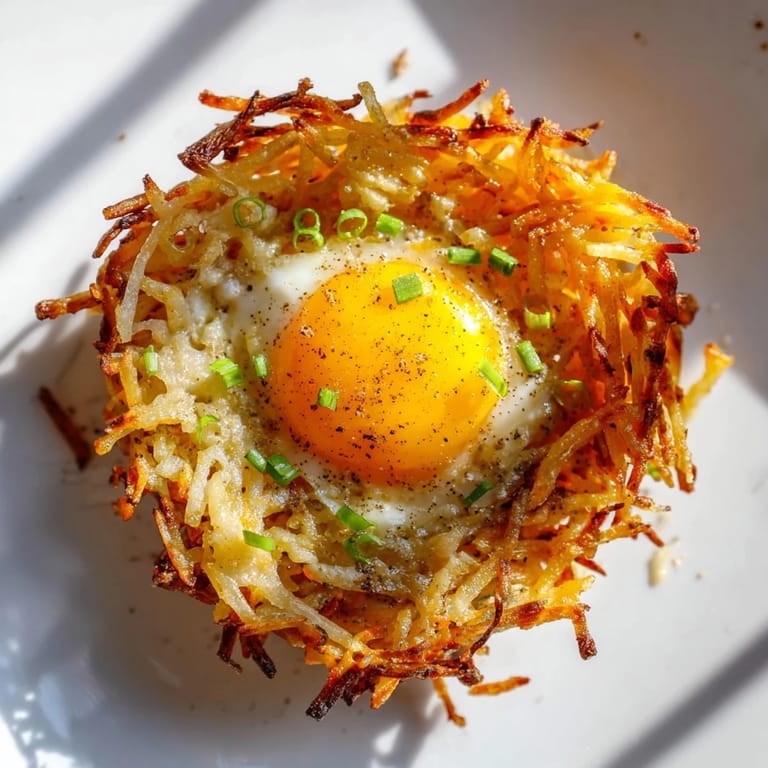
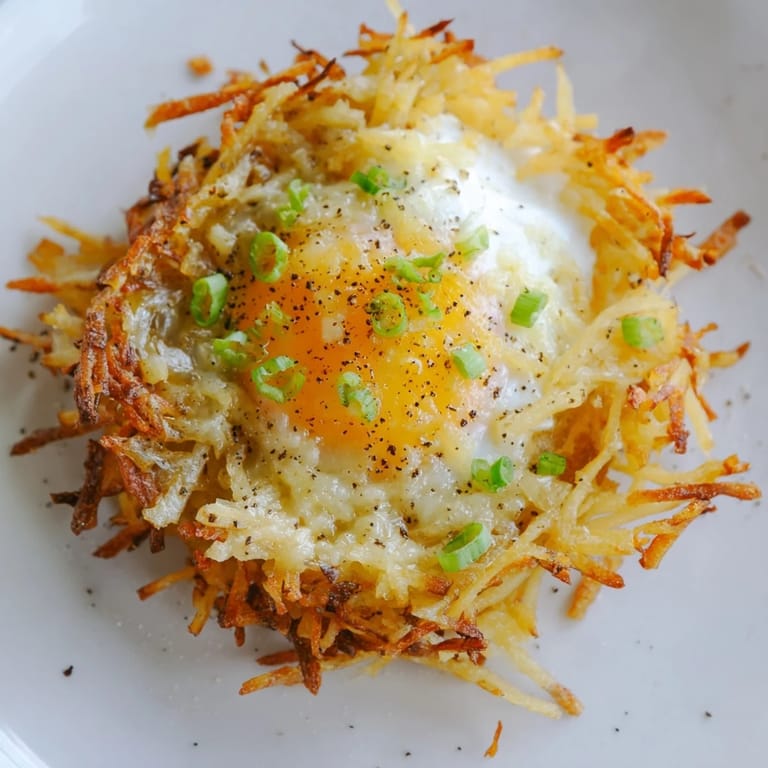
Save One Sunday morning, I was staring at a muffin tin and suddenly wondered what would happen if I treated those little cups like edible bowls. Twenty minutes later, I had golden potato nests cradling sunny eggs and melted cheese, and my kitchen smelled like a breakfast diner in the best way possible. These crispy potato cups became my answer to "what's for breakfast" on every lazy weekend that followed, partly because they look impressive but mostly because they taste like comfort in every bite.
My neighbor peeked over the fence on a Saturday morning when these were coming out of the oven, and I watched his entire expression change from curious to genuinely envious. By the time I slid one onto a plate for him to try, he was already mentally planning when he'd make his own batch. That's when I realized these aren't just breakfast—they're the kind of dish that makes people stop and ask for the recipe.
Ingredients
- Shredded russet potatoes: These hold their structure beautifully when pressed into nests, and rinsing away the starch is the difference between soggy and genuinely crispy cups.
- Melted unsalted butter: This coats every strand of potato and adds richness without overpowering the other flavors.
- Salt and black pepper: Season the potatoes themselves, not just the finished dish, so every layer tastes intentional.
- Large eggs: One per nest keeps things simple and ensures a jammy or cooked yolk depending on your preference.
- Shredded cheddar cheese: Sharp enough to taste present, mild enough that it melts silently into every corner of the nest.
- Scallions or chives: These brighten everything up and give you something fresh against all that richness.
- Paprika: A light dusting adds warmth and color without changing the flavor profile in any dramatic way.
Tired of Takeout? 🥡
Get 10 meals you can make faster than delivery arrives. Seriously.
One email. No spam. Unsubscribe anytime.
Instructions
- Heat your oven and prepare the pan:
- Set your oven to 400°F and grease the muffin tin generously so the nests slide out without sticking. This small step saves frustration later.
- Coat the potatoes:
- Toss shredded potatoes with salt, pepper, and melted butter until every strand is slick and seasoned. The butter is what makes them golden and crispy, so don't skip this step.
- Build the nests:
- Press about a quarter cup of potato mixture firmly into each muffin cup, pushing it up the sides and making sure the bottom is compact. Think of it like building tiny edible bowls that will hold everything safely.
- Bake the bases:
- Bake for 15 to 20 minutes until the edges turn golden and the potato feels firm when you press it gently. You're essentially pre-cooking the base so it has time to get crispy.
- Add the first layer of cheese and herbs:
- Pull the pan out, and while the nests are still hot, sprinkle a little cheese and some scallions into each one. This melts into the potato and creates a flavorful middle layer.
- Crack eggs into the nests:
- Gently crack one egg into each nest, being careful not to break the yolk unless you prefer it scrambled. A little restraint here makes the presentation really special.
- Final seasoning and bake:
- Sprinkle paprika, remaining cheese, and fresh herbs over each egg, then slide everything back into the oven for 10 to 12 minutes until the whites set but the yolk stays just how you like it.
- Cool and release:
- Let the nests sit for a few minutes so they set slightly, then slide a butter knife around each one and lift them out gently. They'll keep their shape beautifully if you give them this brief rest.
 Save
Save There was this one morning when I made these for my partner's birthday breakfast in bed, and watching them cut into the nest and see that perfectly set yolk spill out was genuinely one of those small moments that stuck with me. It reminded me that good food isn't always complicated—sometimes it's just about caring enough to press potatoes into a muffin tin and watch them transform.
How to Make Them Extra Crispy
If you're chasing that deepfried potato chip texture, here's what changed everything for me: brush the inside of each nest with a tiny bit of extra melted butter before the first bake, and let those potato cups go the full 20 minutes in that initial oven time. The butter caramelizes against the muffin tin and creates these golden, almost-burnt edges that taste incredible. I learned this after a few batches where the nests were good but not unforgettable—now they're the kind of crispy that makes you reach for a second one immediately.
Filling Ideas Beyond the Basics
Once you understand the formula, these nests become a canvas for whatever's in your fridge. I've crumbled cooked bacon into mine on rushed mornings, stirred sautéed mushrooms and bell peppers into the cheese layer, and even tried fresh spinach for a moment when I was trying to pretend I was more of a vegetable person than I actually am. Each variation changes the taste just enough to keep breakfast from feeling routine, but the structure stays rock solid.
Serving and Storage Tips
These taste best served warm, right out of the pan, maybe with a drizzle of hot sauce if you're the type who likes heat with breakfast. They'll keep in the fridge for about three days if you store them in an airtight container, and you can reheat them in a 350°F oven for about five minutes to restore some crispiness—though honestly, they're almost as good cold if you're in a hurry.
- Serve alongside a green salad or fresh fruit to balance out the richness.
- These freeze beautifully for up to a month if you stack them gently in a freezer container.
- Reheat frozen nests directly in a 375°F oven for about 10 minutes without thawing.
 Save
Save There's something deeply satisfying about serving breakfast that people remember, and these nests do exactly that. Make them once and you'll understand why I keep coming back to them every single weekend.
Recipe Questions & Answers
- → How do I ensure the potato nests are crispy?
Baking the shredded potato shells a few minutes longer before adding the filling helps achieve extra crispiness.
- → Can I substitute cheddar cheese with other types?
Yes, Swiss, mozzarella, or pepper jack cheeses work well and offer varied flavors.
- → Is it necessary to rinse and drain the shredded potatoes?
Yes, rinsing removes excess starch, and draining helps the nests crisp up during baking.
- → What tools are required for preparation?
A box grater or food processor for shredding potatoes, a mixing bowl, muffin tin, oven, and spatula or butter knife are needed.
- → Can I add extra ingredients to the filling?
Absolutely, cooked bacon or sautéed vegetables can be added for more flavor and texture.